Set Up Tai-e Assignments
This section describes how to set up Tai-e to finish the programming assignments.
Tai-e leverages Soot frontend to parse Java programs and help build Tai-e’s IR. Soot contains two frontends, one for parsing Java source files (.java) and the other one for bytecode files (.class), and the former can preserve variable names (in the source code) in IR, which makes IR closer to the source code and thus is easier to understand than the latter. As a result, in the assignments, we provide test cases (i.e., the input programs to be analyzed) in the format of .java files. However, Soot’s frontend for Java source files is outdated (only partially supports Java version up to 7) and not very robust. Meanwhile, Soot’s frontend for bytecode files, which does not keep variable names though, is more robust (it virtually works well for the .class files compiled by up to Java 17) than the frontend for Java source files. Thus, for real-world applications, Tai-e usually analyzes bytecode.
0 Download Tai-e Assignments
You just need to clone the GitHub repo of Tai-e Assignments, which contains the code and dependencies of all assignments.
1 Content of Tai-e Assignments
The repo of Tai-e assignments contains one Tai-e project for each assignment (e.g., the Tai-e project in A1/tai-e for Assignment 1). Tai-e is built by Gradle and follows typical structure of Gradle projects. The projects of all assignments share the same structure as follows:
build.gradle.kts,gradlew,gradlew.bat,gradle/: Gradle scripts and configuration files for Tai-e.src/main/java: The folder containing source code of Tai-e. You will need to modify the files in this folder to finish the assignments.src/test/java: The folder containing the drivers for running test cases.src/test/resources: The folder containing test cases (i.e., the input Java programs to be analyzed).lib/: The folder containing classes of Tai-e.plan.yml: The configuration file for Tai-e that specifies the analyses to be executed in the assignments.COPYING,COPYING.LESSER: The license files of Tai-e.
2 Setup Instructions
Tai-e is developed in pure Java, and it could run on major operating systems including Windows, Linux, and MacOS. To build and run Tai-e, you need to have Java 17 installed on your system. We will guide you to install Java 17 in this section.
You may choose to download the Java Development Kit 17 from here, or install it with package managers (e.g. Sdkman!), but if you follow our guide, you will not need to install Java 17 in these ways.
We highly suggest you finish our assignments with IntelliJ IDEA. Given the Gradle build script, it is very easy to import Tai-e to IntelliJ IDEA, as follows.
Step 1
Download IntelliJ IDEA from JetBrains and install it. We recommend that you install a recent version (2021.3 or newer) of IntelliJ IDEA for better support of Java 17.
Note: You may wonder: how can we run IntelliJ IDEA without Java? Actually, IntelliJ IDEA has a copy of JRE included for internal use.
Notice: Below we introduce how to setup Assignment 1 (corresponding to the Tai-e project in A1/tai-e/ under the assignment repo). The instructions to setup other assignments are totally the same.
Step 2
Start to open a project
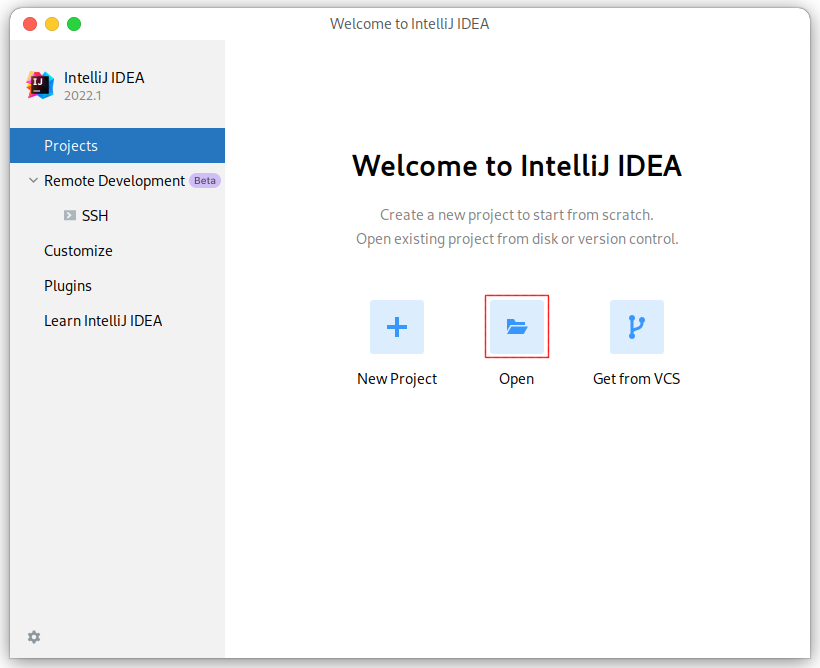
Note: If you have already used IntelliJ IDEA, and opened some projects, then you could choose
File > Open…to open the same dialog for the next step.
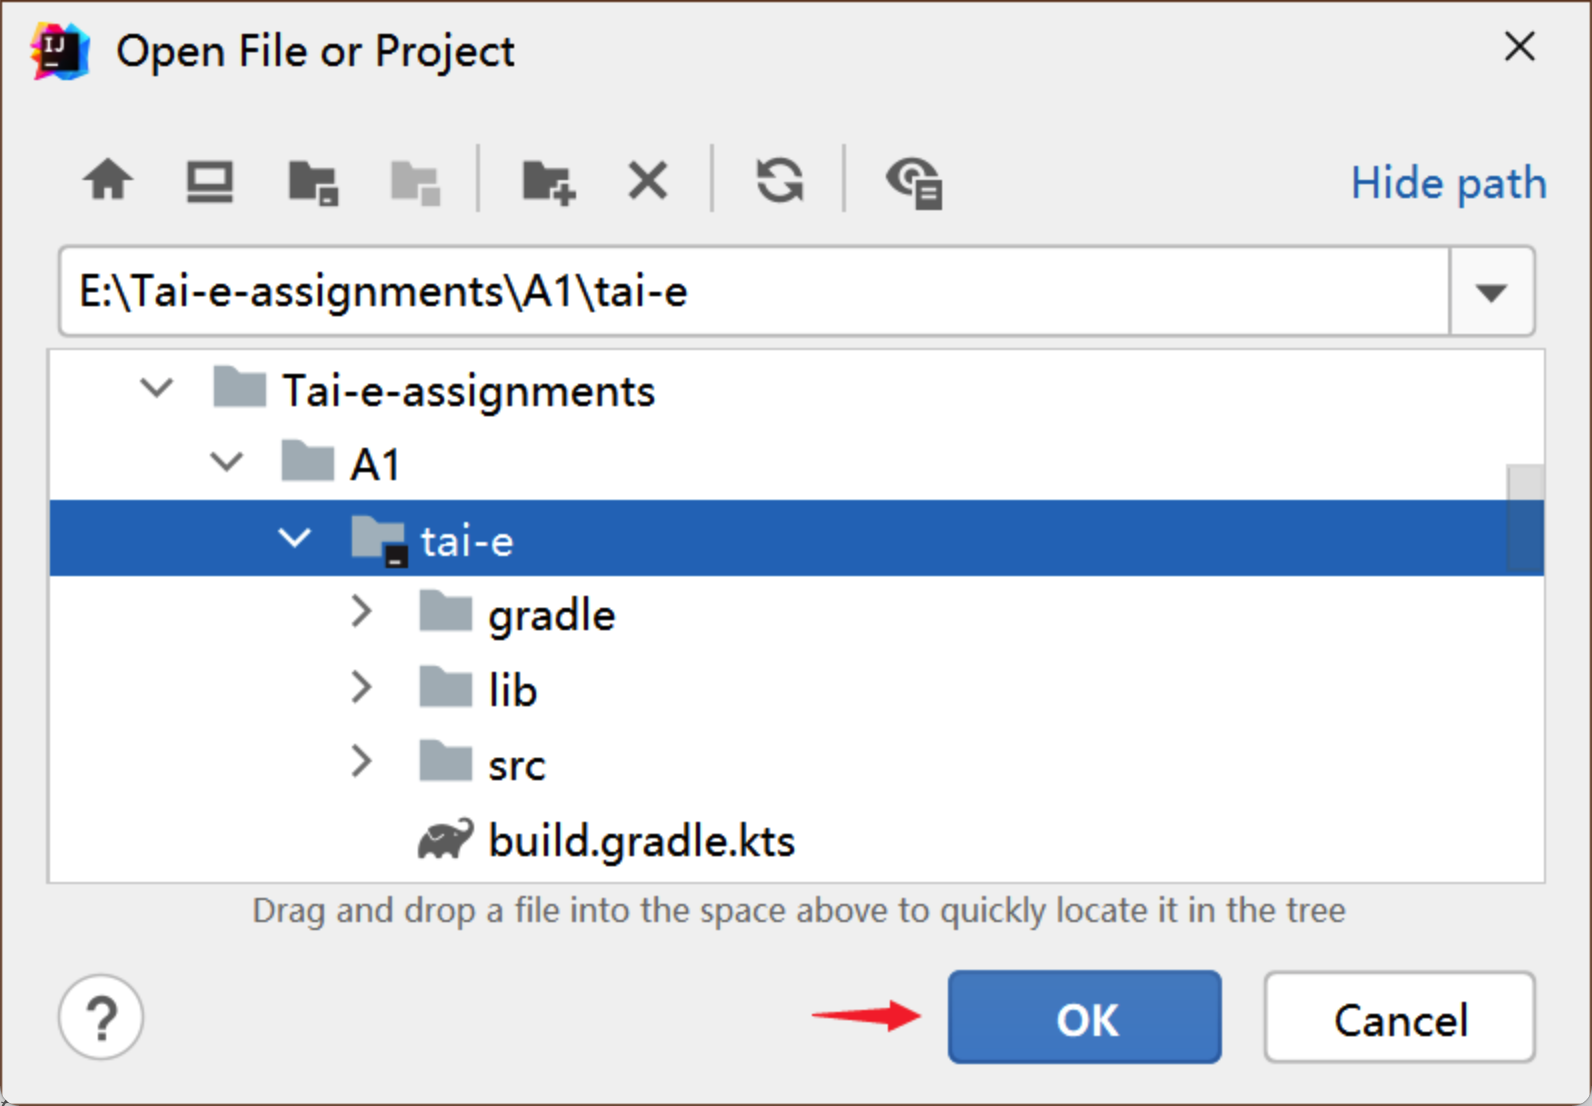
Step 3
Select the A1/tai-e/ directory, then click “OK”.
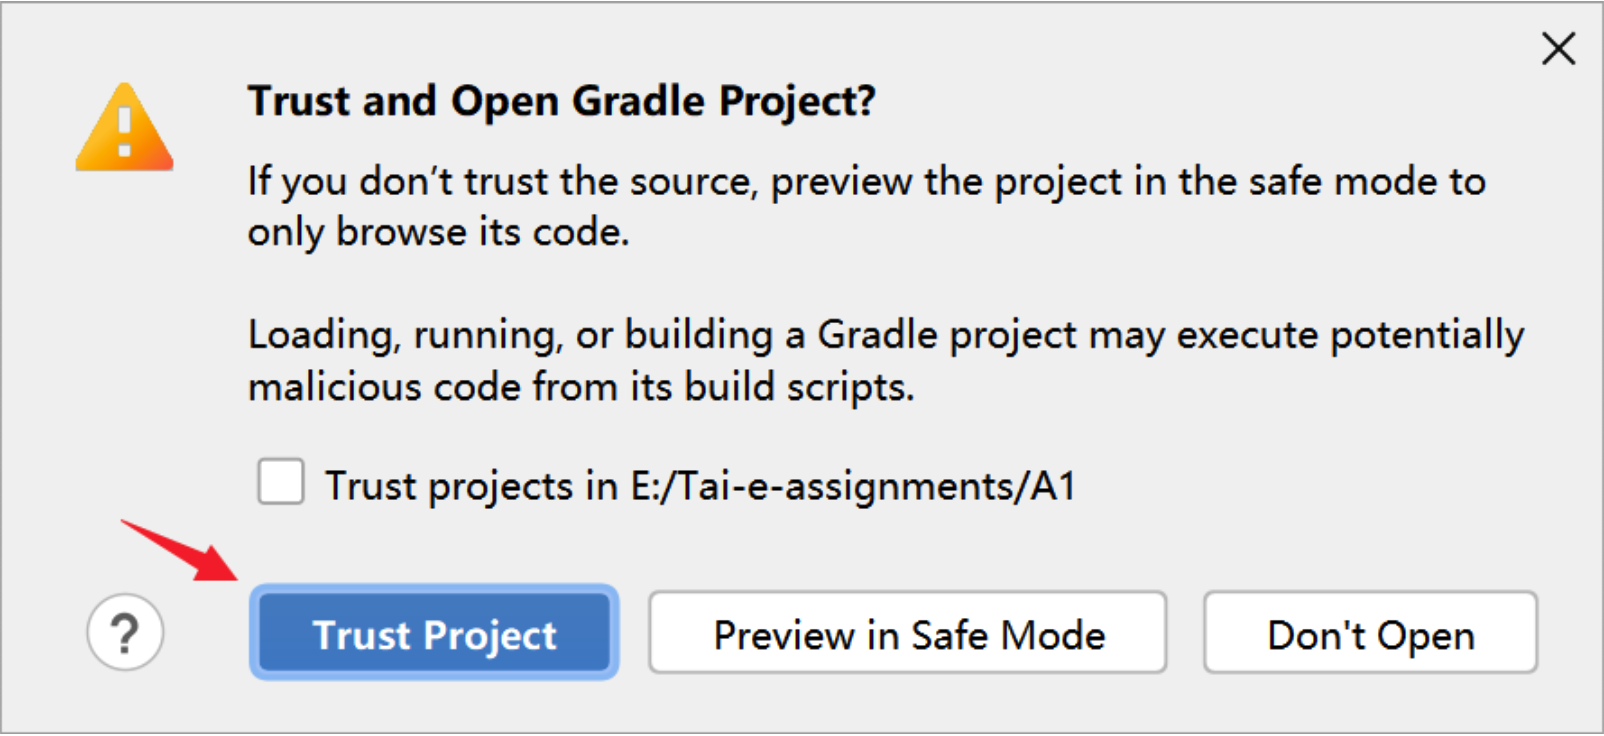
Step 4
IntelliJ IDEA may pop up a dialog asking if you trust the Gradle project. Just click “Trust Project” (Don’t worry. Tai-e is benign 😃).
That’s it! You may wait a moment for importing Tai-e. After that, some Gradle-related files/folders will be generated in tai-e/ directory, and you can ignore them.
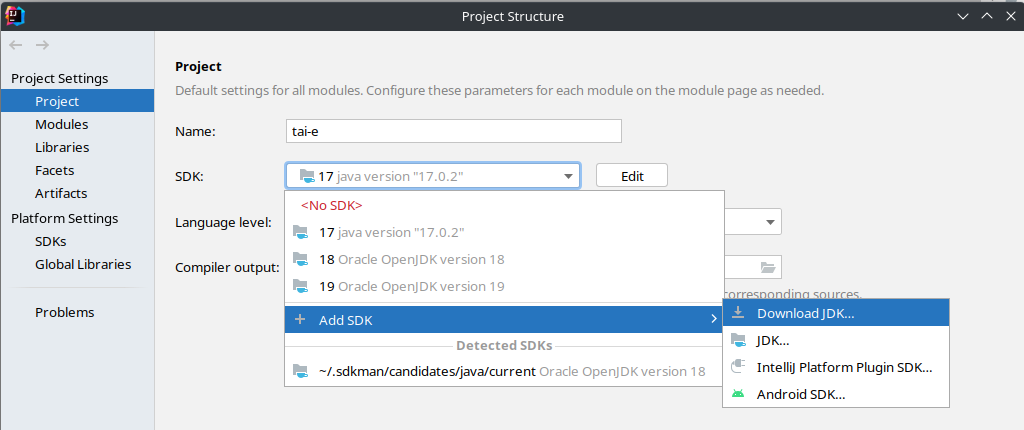
Step 5
Go to File > Project Structure…, click “SDK”, select Add SDK > Download JDK…, and select “Version” to be “17”, any “Vendor” (usually “Oracle OpenJDK”), “Location” to be installation location (usually kept as default), and then click “Download” to start downloading in background.
Next, expand “Language level”, select “SDK default” (if the default is just the latter) or “17 - Sealed types, always-strict floating-point semantics”:
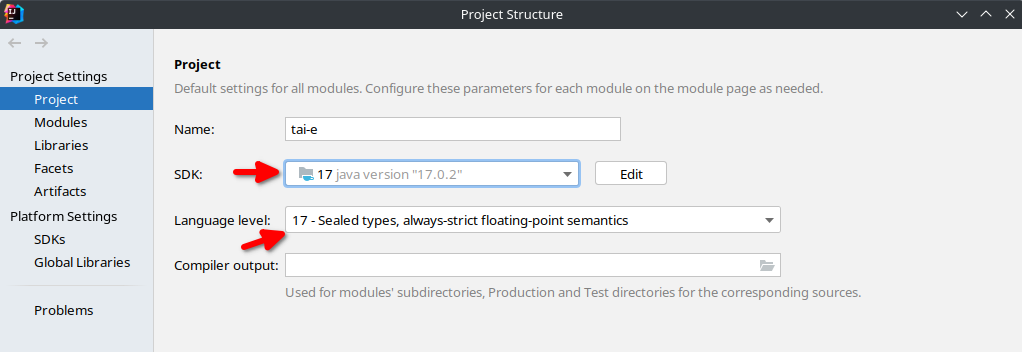
Note: If you have already installed JDK 17, just select your JDK after you click “SDK”, and then jump to setting language level. If your IntelliJ IDEA has already chosen JDK 17 and Java 17 as default SDK and "Language level", then you could skip this step for the subsequent assignments.
Step 6 (optional)
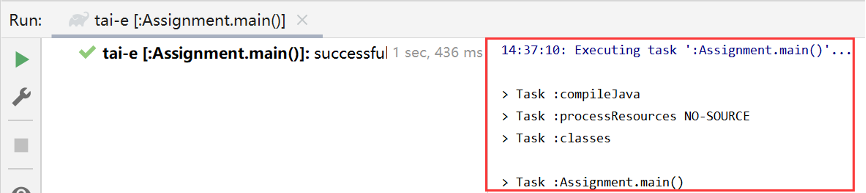
As Tai-e is a Gradle project, IntelliJ IDEA always build and run it with Gradle by default, which makes it a bit slower and always output some annoying Gradle-related messages:
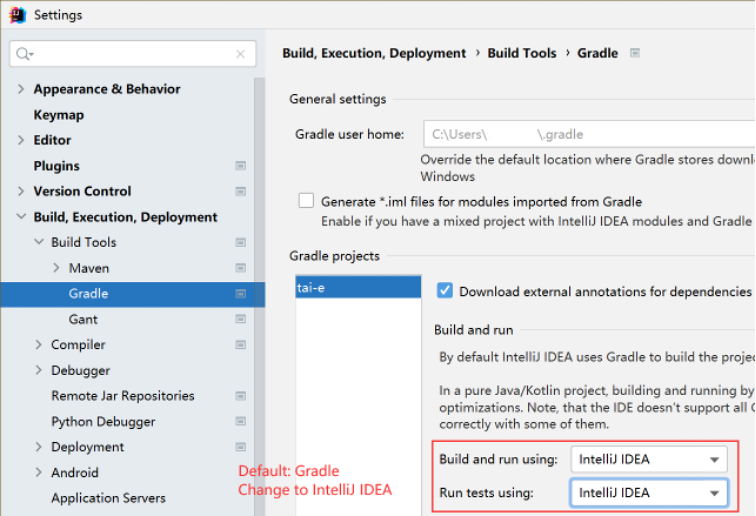
To get rid of these problems, you could use IntelliJ IDEA instead of Gradle to build and run Tai-e. Just go to File > Settings, and change the build and run tool from Gradle to IntelliJ IDEA as shown:
Alternatively, if you (really 😃) want to build Tai-e from command line, you could change working directory to tai-e/ folder, and build it with Gradle:
$ gradlew compileJava
If you could finish above steps, then you have successfully setup a Tai-e project. ヽ(。◕‿◕。)ノ゚
3 Run Tai-e as An Application
We provide a special main class of Tai-e for our assignments:
pascal.taie.Assignment
which offers a simple usage for analyzing programs as follows:
-cp <CLASS_PATH> -m <CLASS_NAME>
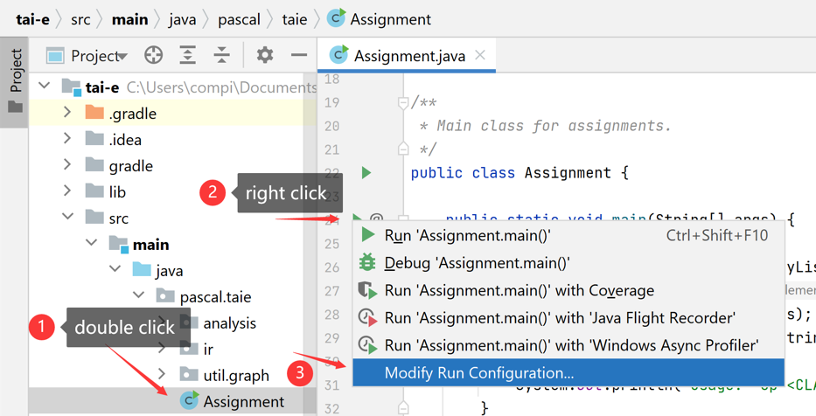
where <CLASS_PATH> is the class path, and <CLASS_NAME> is the name of the input main class to be analyzed. Tai-e locates classes from given class path. For example, to analyze Assign.java in directory src/test/resources/dataflow/livevar, first open “Run Configuration” for Assignment in IntelliJ IDEA as follows:
then configure program arguments as follows:
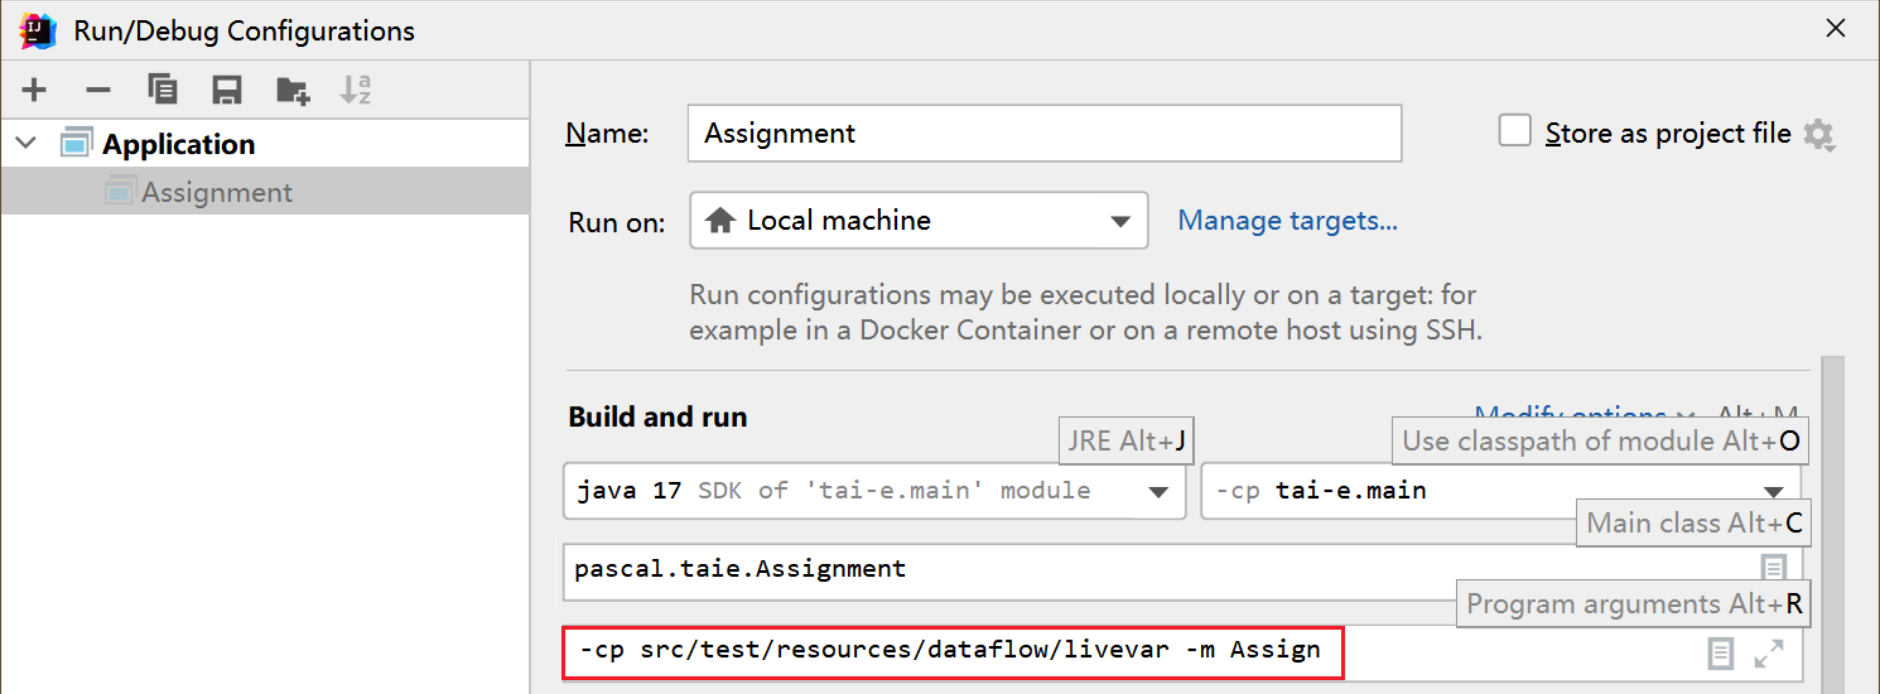
Tai-e performs the analysis for the input program and outputs the analysis results. The analyses and their outputs vary for different assignments, and we will explain the details in the document of each assignment.
Of course, you could also run the analysis using Gradle, with the following command:
$ gradlew run --args="-cp <CLASS_PATH> -m <CLASS_NAME>"
We encourage you to analyze Java programs you write using the approach introduced in this section, as it helps test your implementation, explore the ability of algorithms, and deepen your understanding of static program analysis. During this process, you may encounter some problems. Therefore, we have collected common problems and solutions into one document for your reference.
4 Test Your Assignments with JUnit
To make testing convenient, we have prepared some Java classes as test inputs in folder src/test/resources/. Every class has an associated file named *-expected.txt, which contains the expected results of the analysis. You could analyze these test inputs by running test class (powered by JUnit) in src/test/java/. Different assignments contain different test cases and test drivers, and we will explain their details in each assignment document.
The test driver analyzes all provided test cases in src/test/resources/, and compares the given analysis results to the expected results. If your implementation is correct, the tests will pass; otherwise, it may fail and output the differences between expected and your results.
Again, you could run tests with Gradle, just type:
$ gradlew clean test
This command will clean the build directory, rebuild Tai-e, and run tests.
It should be noted that test cases that come with Tai-e Assignments are not comprehensive, which means that they are far from enough to test the correctness of your implementation of the analysis algorithm. Therefore, we have built an Online Judge System and prepared more corner cases to test your implementation. However, some of those test cases are not public as we hope that you could consider corner cases and write corresponding test cases by yourself. For the usage of the Online Judge System, please refer to Grade Your Programming Assignments.